Technology Knowledge of Straight Button Holing Machine JK1790
- Adjust the needle rod
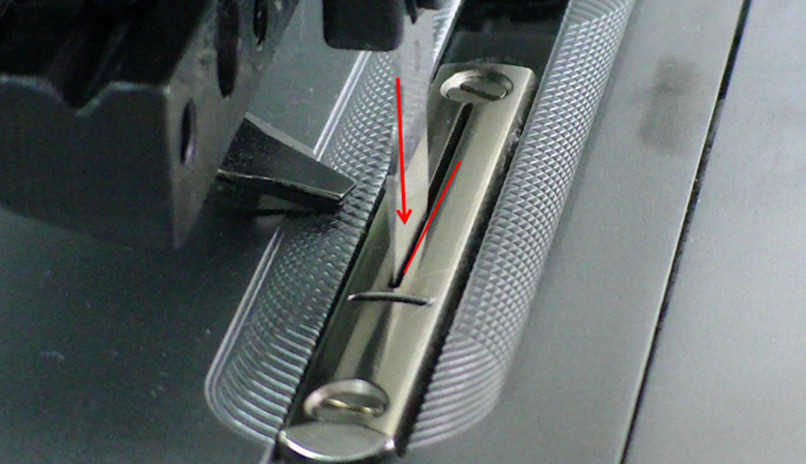
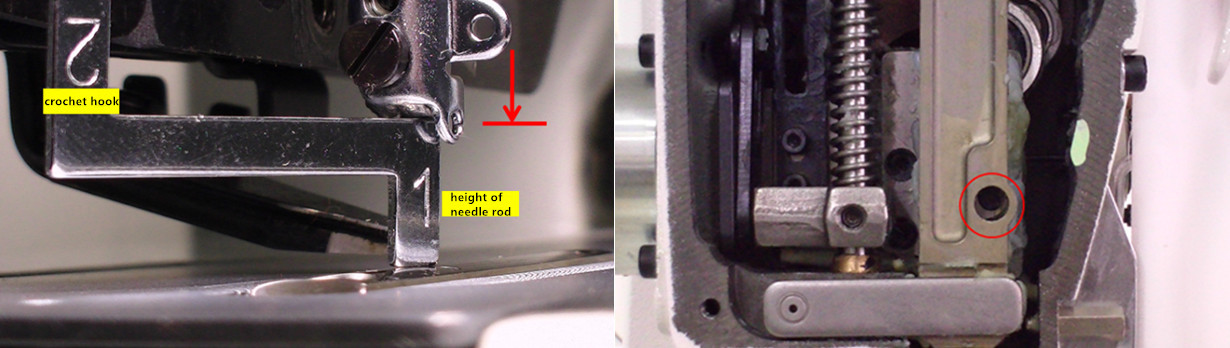
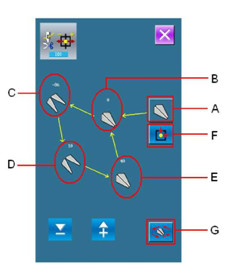
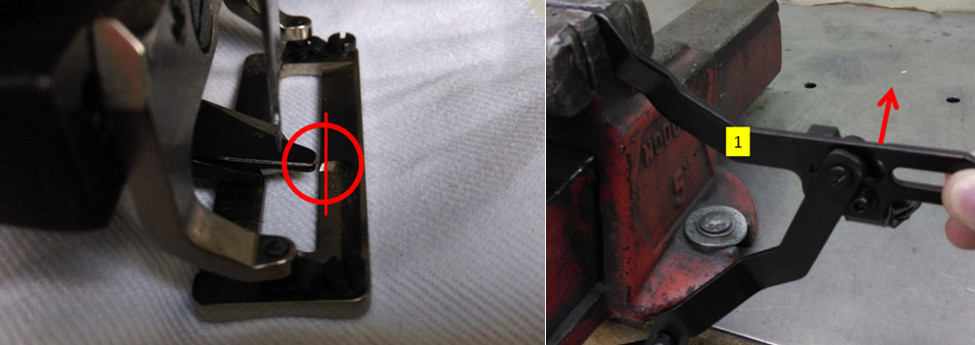
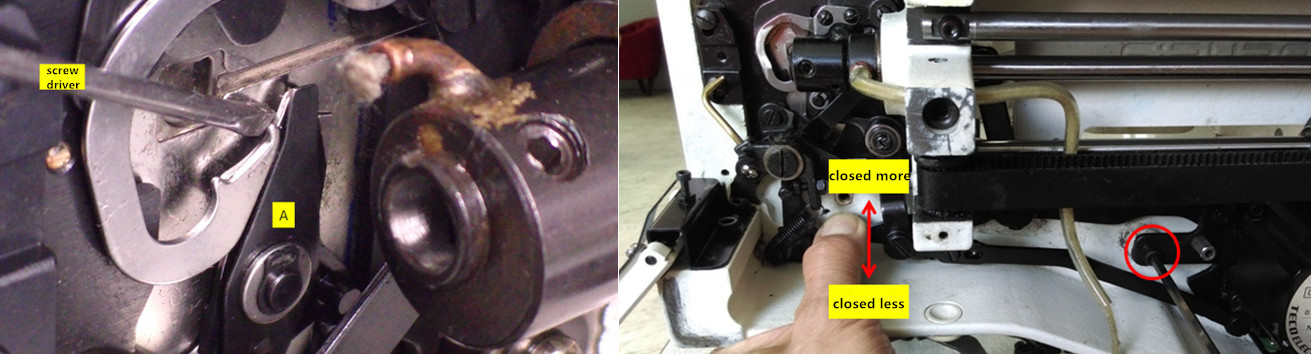
Under the yellow backlight, press the thread winding key (PIC. 1) to check whether the needle is aligned with the cutting knife groove of the needle plate, and whether the needle is in the center point of the needle plate. Then adjust the height of the needle rod with the synchronous gauge and ruler.
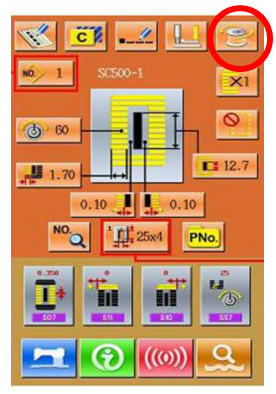
PIC. 1
1,Please check the needle is aligned with the needle plate cutting knife groove or not. If not, we can loosen the screw to adjust.
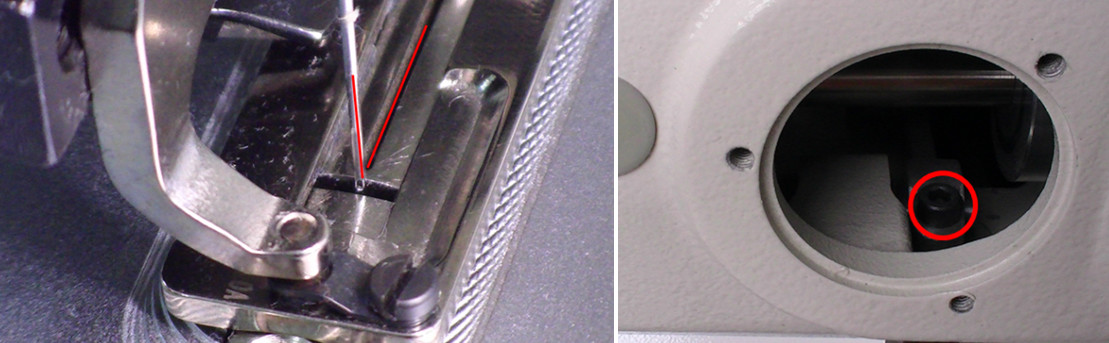
2,Please check the needle is in the center of the needle plate or not. If not, we can loosen the screw to adjust and please pay attention to the cloth cutting knife. We should avoid the cutting knife out of position.

3,After moving the needle plate, when put the the cloth cutting knife, we should leave a gap between the cutting knife and the cloth cutting knife groove of the needle plate to avoid collision.
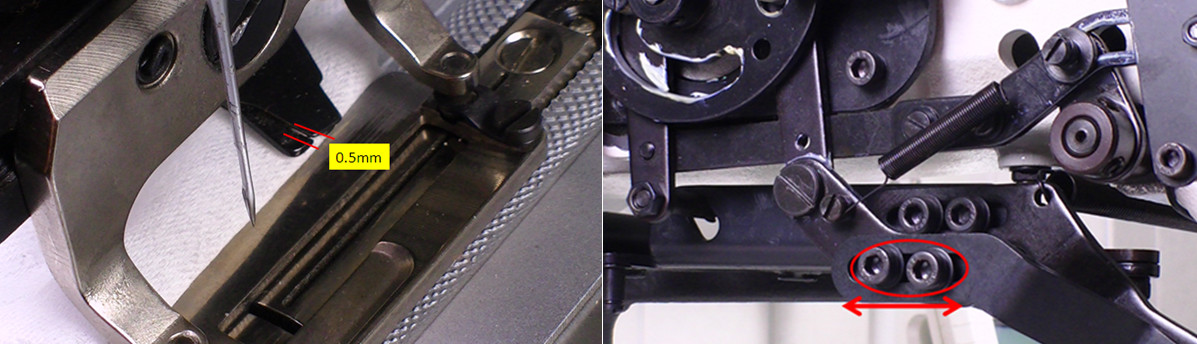
4,When the needle rod goes to the starting point, it does not move. We can use the synchronous gauge and ruler to measure, or use the measuring ruler. To keep the starting point of the needle rod does not move, and the height of the needle rod should be around 16.5~17mm. If have any error, please loosen the screw to adjust.
- Adjust the upper scissors
Adjust positions of the upper knife when put the knife:
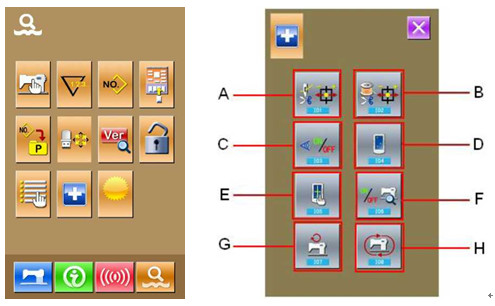
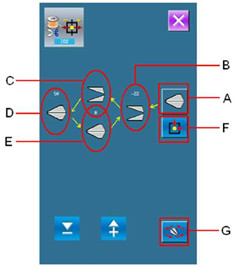
1,Enter the 2nd parameter, press the “+”, then press “A” to enter a new interface.

2,Press “G” to the movement E.
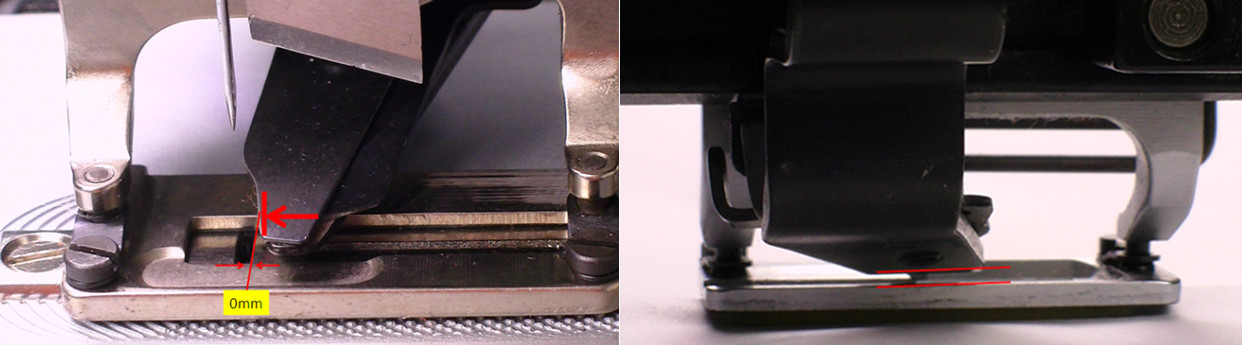
3,Check whether the leading edge of upper scissors is aligned with the leading edge of needle plate and whether the upper scissors are parallel to the pressing foot.
If there is any error in the above positions, please loosen the screw and adjust to the perfect condition.
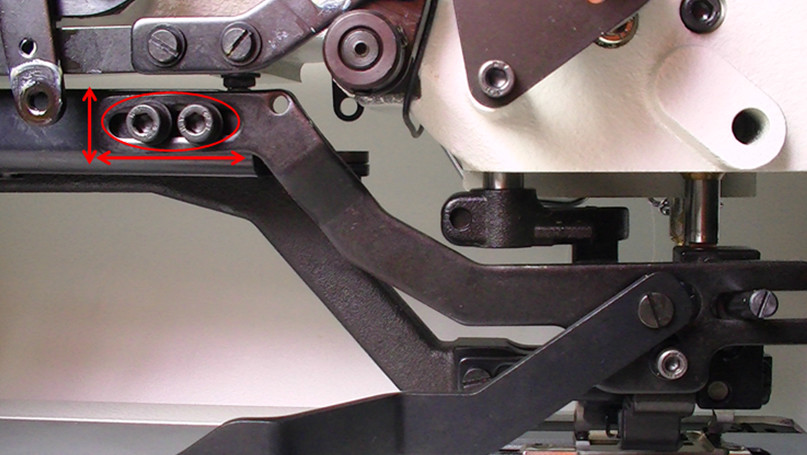
4,Please push “1” and check the gap between “1” and “2”, “1” and “3”. There should be no gap and crash between “2” and “3”. It should be a little tight between “2” and “3” .
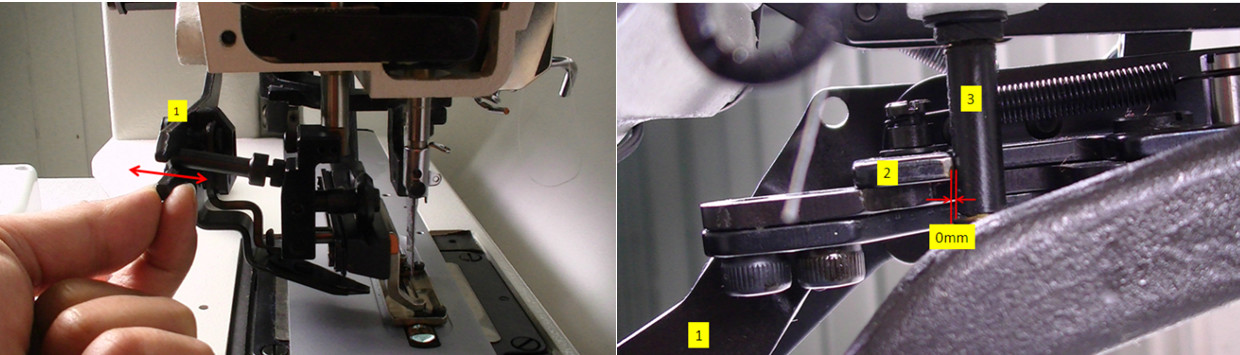
If there is any error in the above positions, please loosen the screw to adjust.
5,Check the upper scissors by your hand. There should have a little gap before completely closed. If there’s any error, please adjust the closing volume of the scissors to keep the distance about 1.0~1.5mm.

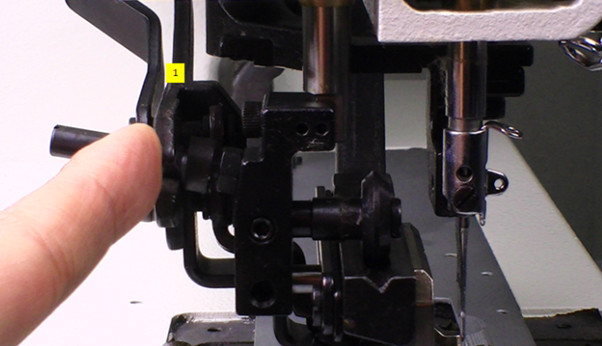
6,Gently press “1” with your hand. Then press “G” key and do the continuous actions to detect whether the four movements are smooth.
Adjust positions of the upper knife when take out the knife:
1, Press “G” to the movement B.

2, Make sure the B position(the position when we take out the knife) should at the inner side of the press foot. If have any error, please adjust “1”.
Adjust opening volume of the knife:
1, Press “G” to the movement C.

2, Make sure opening volume of the knife is 0.5mm. If not, please loosen the screw to adjust.
- Adjust the lower scissors
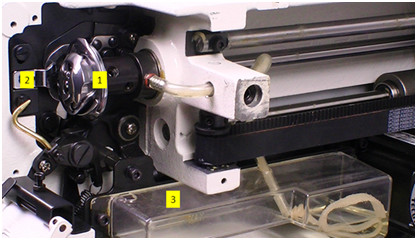
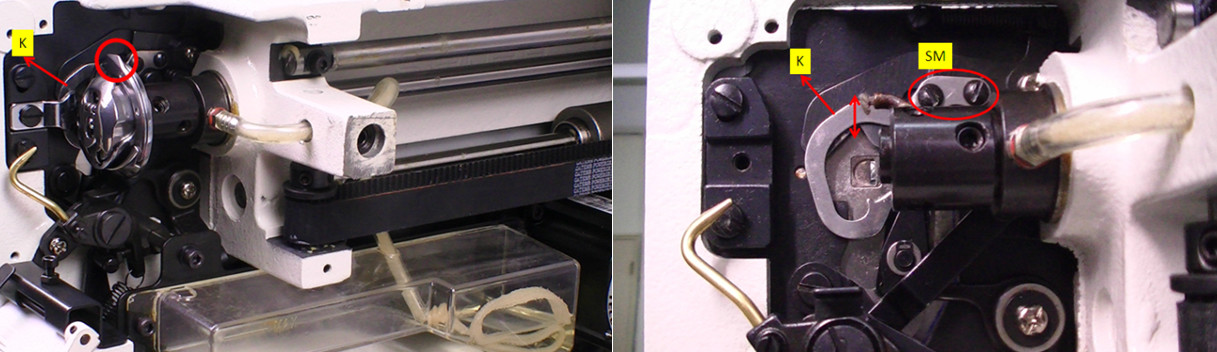
Note: please disassemble the parts when adjusting the position of lower knife: 1. Hook 2. Hook fixing rod 3. Oil pot.
Adjust closing volume of the lower scissors:
Enter the 2nd parameter, press “+” , then press “B”.
1, Press “G” to the movement E.

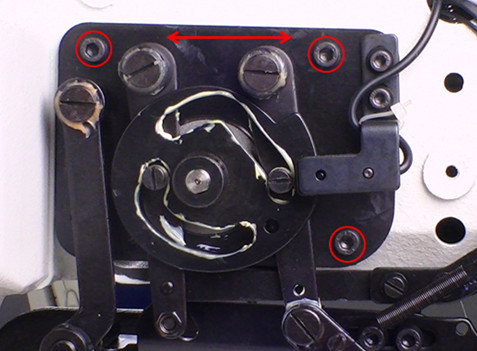
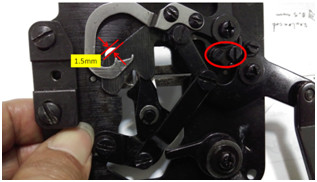
2, Check the lower scissors by screw driver. There should be a little gap. If there’s any error, please loosen the screw to adjust.
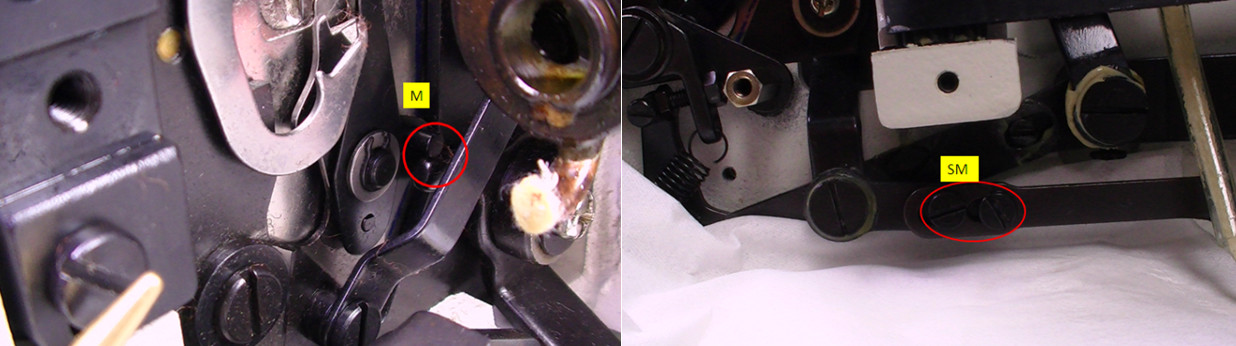
3, After adjusting the lower scissors, please pay attention to position of “B”. If have any difference, please loosen the “SM” screw to adjust.
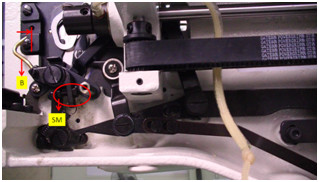
4, Machine will start work after put inside the hook. The convex point of the hook cannot collide with “K” part. If have any error, please loosen the “SM” screw to adjust “K” part.
5, The gap should be 1.5mm. If have any difference, please loosen the screw to adjust.
Adjust opening volume of the lower scissors:
1, Press “G” to the movement B.
2, Make sure opening volume of the lower scissors should keep 3-4mm.
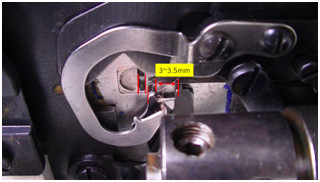
3, Loosen “SM” screw first and adjust the opening volume of the lower scissors. Then keep “M” bear aganist the scissors and lock “SM” screw. If have any error, please loosen “SM” screw to adjust.