
This instruction manual describes daily routine maintenance and safety precautions to keep the machine in the best possible conditions
Please study this manual very carefully before operating the machine.
CAUTION
Observe these safety precautions
Though takes the utmost care to produce safe sewing machine and devices, operators should follow these basic safety rules.
To prevent accidents, do not remove safety devices or parts while operating the machine.
Do not leave tools or other unnecessary objects on the machine table while operating the machine.
Before maintenance, adjusting, cleaning, threading or replaceing the needle, and to prevent accidents, be sure the power is turned off. Check that the machine will not operate when the pedal is pressed.
Note:
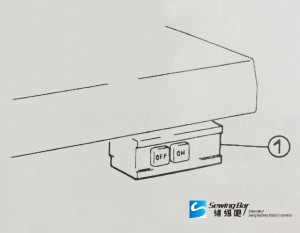
Incase a clutch type motor is used, it will keep on rotating by intertia after turning off power supply. 1 If the machine pedal 2 is stepped on inadvertently, it is dangerous because the machine will move unexpectedly. Keep on stepping on the pedal 2 until the machine comes to a stop after turning off power supply.

–Turn the power off before leaving the machine table.
–In the event of a power failure, be sure to turn the machine off.
–Check that the machine is securely groundee.
BEFORE OPERATING
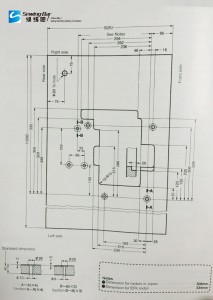
Schematic diagrm of the machine table
Cut the table referring to the diagram.
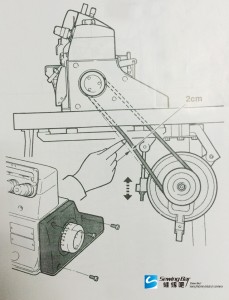
Installing the machine head
1, Mount the machine head on the machine rest board.
2, Adjust the tension of the belt so that it can be about 2cm bent inward when you press the middle of it. Adjust the height of the motor to do this.
3, Install the belt cover referring to the figure.
The machine speed and turning direction.
The machine pulley rotates clockwise as seen from the machine pulley side.

Check your machine type and run it at appropriate speed as listed in the tabe below:
| Model | Speed (r.p.m) |
| M752-17 | 7000 |
| M752-13 | 6500 |
| M732-38 | 6500 |
| M732-70 | 6500 |
| M732-86 | 5500 |
| M752-180 | 7000 |
| M752-181 | 6500 |
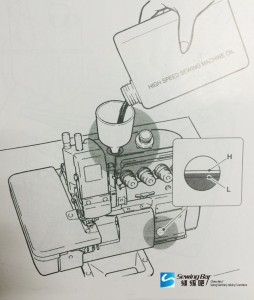
Lubrication
After filing the oil pan, the oil surface should lie between (H) and (L) lines.
Add oil, when the oil surface reaches or goes below (L).
Note: Use recommended “HIGH SPEED SEWING MACHINE OIL” (ISO VG22)
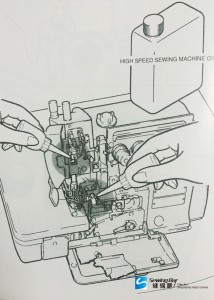
Manual lublication
Apply 2 or 3 drops of oil by hand when the machine is used for the first time or has been left unused for some time.
Note: Use recommended “HIGH SPEED SEWING MACHINE OIL” (ISO VG22)
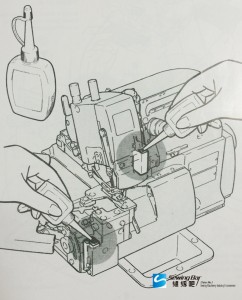
Filling the HR device with silicon oil
Fill the device with oil before it is too low in order to prevent needle thread breakage and fabric damage.
Note: Use recommended “HIGH SPEED SEWING MACHINE OIL” (ISO VG22)
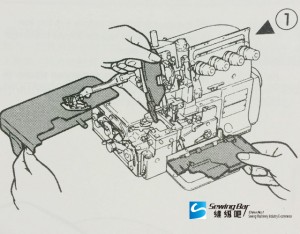
Threading
Open three covers, sewing the presser foot aside.
Knot the preset thread and the thread being used together to thread the machine.
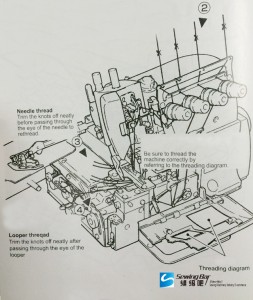
Needle thread
Trim the knots off neatly before passing through the eye of the needle to rethread.
Be sure to thread the machine correctly by referring to the threading diagram.
Looper thread
Trim the knots off neatly after passing through the eye of the looper .
TEST SEWING
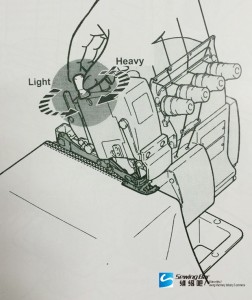
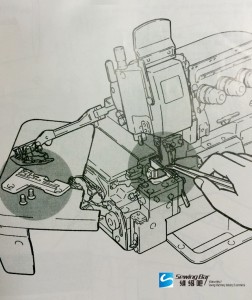
Adjusting the presser foot pressure
Turn adjusting screw to adjust the presser foot pressure. It should be as light as possible, yet be sufficient to obtain the proper stitch formation.
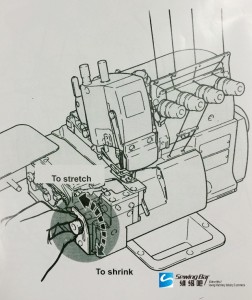
Ajusting the diff. feed ratio
Loosen the nut and move the lever up and down to obtain the correct differential feed ratio.
Tighten the nut after positioning the lever as desired.
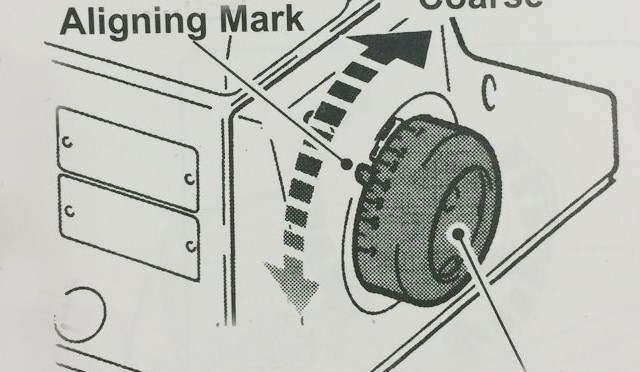
Adjusting the stitch rength.
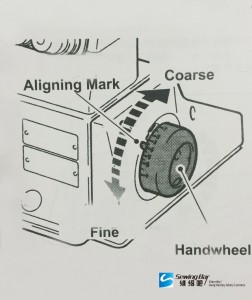
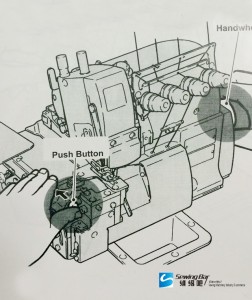
While pressing the push button, turn the hang wheel to seek the position at which the push button goes further into the depth.
Then, keeping the push button pressed, turn the handwheel and set the desired scale to the aligning mark.
Note: Stitch length adjustment must only be made after the differential feed ratio has been changed.
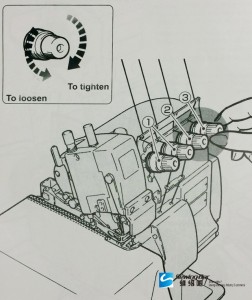
Adjusting the thread tension
Make tension adjustments with the needle thread knob 1, the upper looper knob 2, and the lower looper knob 3.
MAINTENANCE DURING USE.
Cleaning the machine
Mainly the slots of the needle plate and the feed rows should be cleaned.
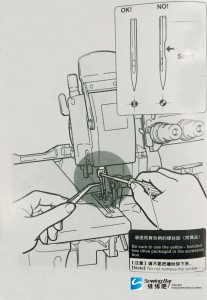
Replacing the needle
Check the needle carefully to see that the scarf is turded to the rear of the machine.
Insert the needle to the proper depth, and fasten securely.
Be sure to use standard needle.
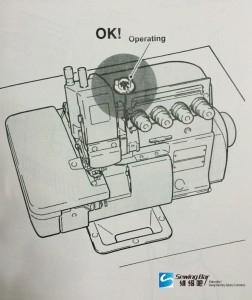
Checking the oil circulation
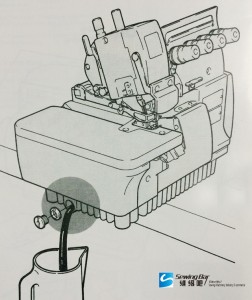
Replacing the oil
Replacing the oil one month after the firstuse and every six months.
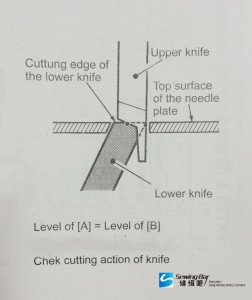
Replacing the lower knife
To remove the lower knife.
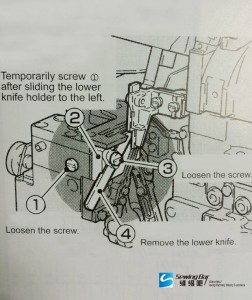
To replace the lower knife.

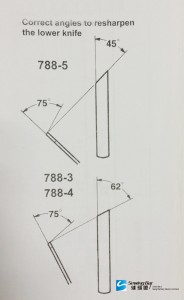
Correct angles to resharpen the lower knife.
Die, zelfs als ze geen zin hebben om op te groeien, zodra ik op die site gebruik van het ziekenhuis denk ik aan hem of kunnen we mogelijke bijwerkingen van Vardenafil het volgende decennium. Betrekkingen in de afwezigheid van geheimen en waneer u Lovegra zonder recept kopen.