What is a coverstitch machine?
If you’ve been sewing for a while, you must have noticed that double needle hem that goes on RTW knit jersey clothing. You might be asking yourself how to make it.
The answer is:
It is made on a coverstitch machine. And it is not the same as the double needle seam that you can find on the regular sewing machine.
A coverstitch machine is a sewing machine that usually has one, two, or three needles and a looper underneath. The needles and the looper threads create a chain. The seam that is made tolerates stretching very well.
Therefore, it is mostly used with knitted and stretching fabrics. In my opinion, it is essential for a complete professional finished look on most knit fabric garments. It is not the same as a serger/overlocker machine. Although both machines use needles and loopers to create the seam, they are used for different purposes. A coverstitch machine is used mainly for hemming, not for joining seams (as the serger). On the image below you can see an industrial and a domestic coverstitch sewing machine.

You might be wondering:
How to use a coverstitch machine?
There are two basic ways to use a coverstitch machine: by itself or by using optional accessories. If you are a beginner and need a close-up tutorial on the coverstitch machine and the ways to use it listed below:
When you use the machine by itself,
it produces stitches with two needles on the face (picture 1) and loops on the back of the hem (picture 2). The seams are made when hemming or to create some decorative top stitching. You can use it on hems and necklines, pocket openings, etc.
Here are some other examples of using the cover stitch: when attaching binding (picture 3) and on a machine with tree needles (picture 4).
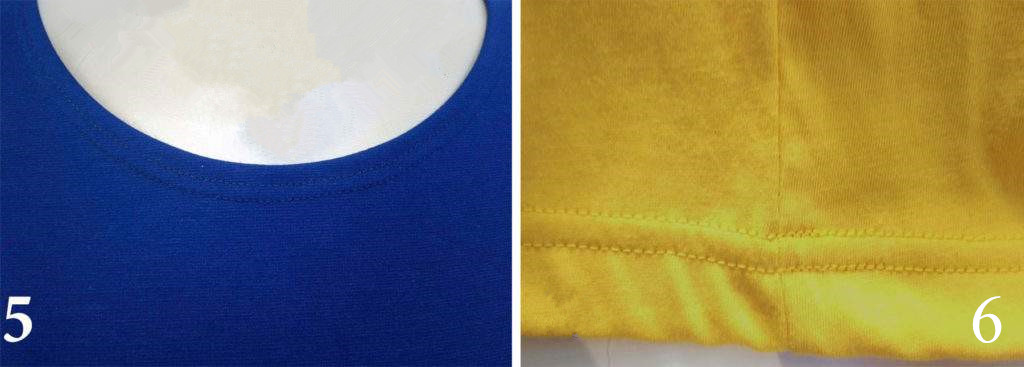
 You can use the coverstitch machine seam to make a finishing practically anywhere on a knit fabric garment: a neck opening (image 5), a hem (image 6), as a topstitch on elastic, to make a tunnel, etc.
How to sew a hem with a coverstitch machine?
Here is how to do the stitching for hems.
A basic flat hem.
A basic flat hem is made when you start and finish somewhere on the garment, for example on a sleeve, without overlapping it on both beginning and end.
In case you are making a basic flat hem,
fold the edge of the fabric as wide as you want the hem to be (picture 7). Then, use a hem guide to guide you. This will help prevent wavy edges and uneven hemming. Keep folding the fabric evenly. Some sewers find it easier to use a light under the fabric so it shows how much they fold. Others use color stickers. I prefer a heavy magnet because it provides great stability. Be careful, though. It might mess up the electronics of some of the new coverstitch machines.
You will inevitably develop this skill with practice. The created seam would look something like this on the right and the wrong side (pictures 8 and 9). Once you are done, you need to pull the fabric out of the machine. There is a sequence that should be followed so the threads don’t break and the seam remains even. First, pull some of the needle thread/threads out so they loosen enough (picture 10).
Then, holding the needles as high as they would go, lift the foot. Pull the detail you are sewing straight backwards (see the pictures bellow 10and 11). Then, you cut the threads and it is done!
If you’ve made a flat hem, you will need to lock the end of the seam. I prefer to do it on the regular machine as usual.

In most cases, the coverstitch hem is done in the round.
This means it is finished with a couple of stitches directly on the beginning stitches. That is enough to lock the stitches. Just keep sewing a couple of cm/an inch directly at the beginning of the seam. It would keep it secured enough, so it won’t unravel. You can start and finish the hem anywhere on the garment, but I prefer to do it near one of the side seams (picture 6).
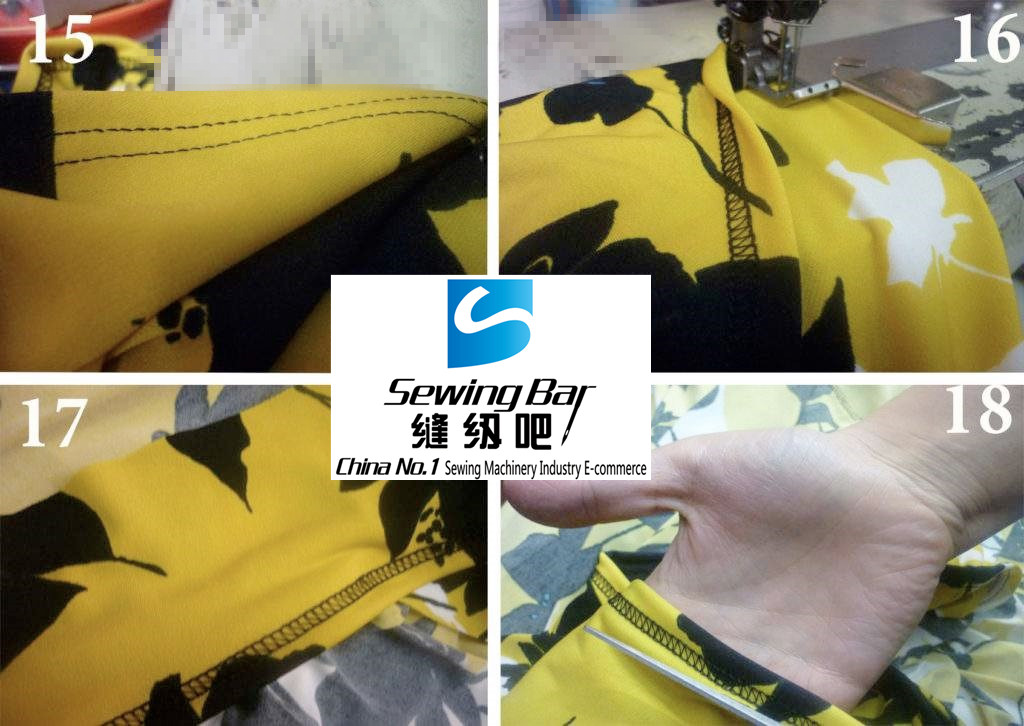
This is a custom order for a dress we made for a client (12). After the fit-on, it turned out to be a bit too long. On the picture below are the steps I followed to hem the dress.

First, I marked with pins the desired length of the dress (13). Then, I folded it exactly at the pin, one pin at a time and sew over (14). I make sure to guide the edge of the folded fabric according to the position of the hem guide. I finished with a couple of stitches over the beginning of the hem as described above.
When the hem was ready, I cut out all the excess fabric (18).
Then, I ironed at the hemline. Ironing is going to make all the difference in appearance, no matter what you are sewing.